📡 Print Smart, Live Free!
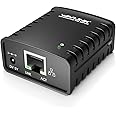
The WAVLINK USB 2.0 Network Print Server allows you to convert any USB printer into a network printer, enabling multiple users to print from any computer connected to the LAN without the need for additional drivers. Compatible with a wide range of operating systems and printers, it offers a hassle-free solution for both home and business environments.


M**N
Works fine, just needs some basic tech skills
Straight forward to setup with a bit of tech skills, as per other reviews, find the IP address on your router or from command prompt via the "arp -a" command. add as a new printer, manually configure the TCP/IP port to use LPR with a queue name of lp1 - manaully find and add your printer, job done. (The inlcuded instructions state this)We're using it with a Zebra ZD220 label printer with no issues.My only mistake was updating the existing printer to use the IP port rather than just adding it as a complete new device.
S**N
Multi computer server for printer
I purchased this unit in the hope I could link my two computers together to talk to my printer scanner.I ended up having to purchse an additional USN-LAN connector. Guess what it was a complete waste of time/money.
M**Y
A tiny print server that works with a little patience
A great little print server, but as one guy said with a set of addition info, you really need to know your stuff to get it working, make a note of the IP address on the bottom of the server unit for setting it up and download their manual as it explains things better than what you get in the box.Make sure you set a fixed IP for your server through your router and then set it fixed in the print server settings.If you are using a public network then set a password on the print server to stop people accessing it.It should work with any printer, as long as you get everything right with the settings.
P**L
printer server
sorry but I had to rate this low. there's a problem where you can't change the dhcp settings and everytime I did it just reverted back. if that issue wasn't there then great device but unless your prepared too change your entire networks subnet then I would stay clear. this wouldn't be user friendly to anyone with not much network experience.
M**D
Forgot the bad reviews, Find the IP, Printer Settings are LPR, queue Name lpr1 & LPR Byte Counting
Great Little Item, purchased for my work. I wasn't allowed to install the strange software that came with it, on to my Print Server on Windows 2023.The key thing to get this item working, is to find its IP address on your router/dhcp table. The mac address is on the back.All you need to add this is to add a printer port using the IP address, it needs to be LPR (not RAW), under LPR Settings the Queue Name needs to be lpr1 and tick LPR Byte Counting Enabled.
L**N
Alright, cheap and works.
Same as the tp-link one... it’s dated, bit limited, but cheap and works.Doesn’t support airprint.... i wish it was power over usb rather than the large powerpack
E**�
Worked in the end! 🤔
Firstly, a massive thanks for the step-by-step instructions from user 'a random busybody'; that write-up was more helpful than the entire manufacturer's website 👍After following all the instructions, I still couldn't get this box to work. The issue was that it wasn't connecting to my router. The software installed fine on my PC, and it even found my printer drivers. However, my PC couldn't detect the actual printer because the hub just wasn't connecting through the router.To resolve this issue, I plugged the hub directly into my laptop via the Ethernet and visited the default webpage for the hub, which is '169.254.10.10'. Then I realised what the issue was. The hub and my router had a mismatch between IPs, even though the hub was set to DHCP.To address this, I did the following**1. Configure the Wavlink to use Static IP:*** Access the Wavlink's web interface using its default IP address (169.254.10.10)* Locate the network settings section and change the IP configuration from "Automatic (DHCP)" to "Manual."* Set the IP address within the your routers DHCP pool range, for example, 192.168.1.201 (avoid using addresses already assigned to other devices).* Set the subnet mask to 255.255.255.0 (or what ever your subnet mask is), which matches the routers network.* Apply the changes and reboot the Wavlink print server.**2. Reserve an IP address for the Wavlink in your router settings (if you can):**This resolved my issue, and my network could now see the hub and everything worked.Ps: There is no CD in the box (or at least not in mine, you may need to go to the manufacturers website to get the required drivers)
Trustpilot
4 days ago
2 days ago